Search This Blog

Showing posts with label biscuits. Show all posts

Thursday, 17 August 2017

Pizza Biscuits. A Happy Accident.


Have you ever completely messed up a recipe? Something that you make all of the time? Something that takes too much to just toss it in it in the garbage bin? That's exactly what I did here. Instead of throwing out my yummy biscuits which I had completely burned...I made pizza biscuits. They turned out great...let's call them a Happy Accident. 

Every time I set out to make my homemade biscuits, this is my mission...


Delicious, warm, buttery biscuits, served with homemade jam.  This is how they turned out...


What the heck!?! In the midst of packing chaos, play dates and busy children, I forgot about my biscuits. They still took time and effort to make. I simply couldn't toss them. I couldn't eat them either...not without slicing the tops off and feeling disappointed with my latest kitchen creation. That's when inspiration struck!


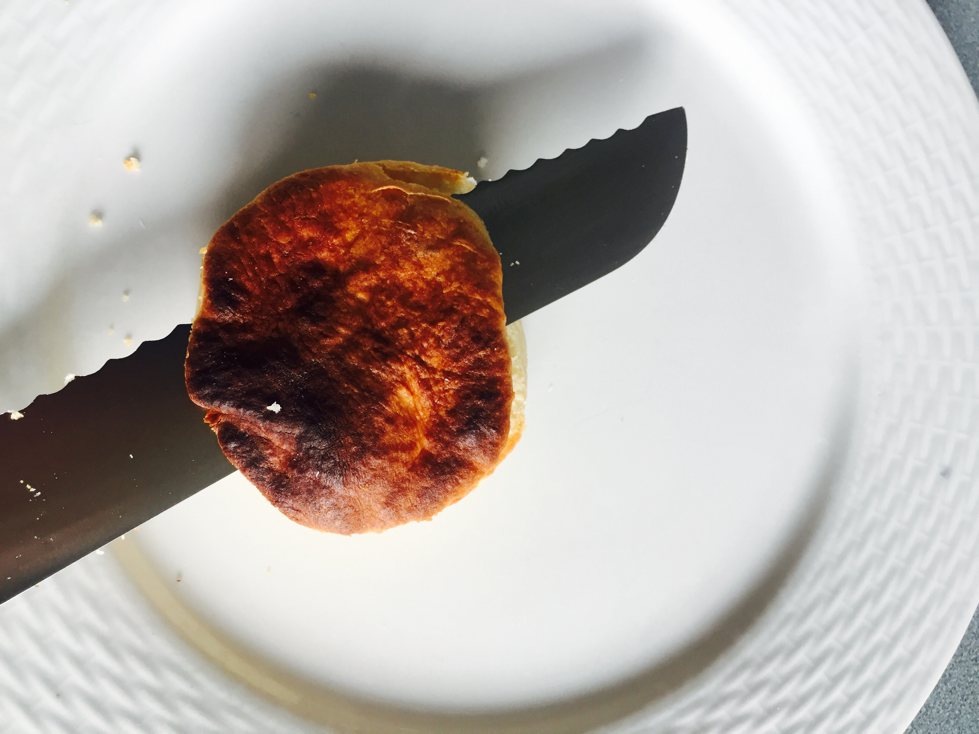
Pizza biscuits! Good bye overly browned biscuit tops. 


I quickly smeared my favourite pizza sauce on to my topless biscuits and then sprinkled with a healthy dose of oregano. 


Mmmmmm...I topped each biscuit with a slice of mozzarella and felt pleased with myself. I was turning a failure into a success. 


I popped those suckers in the oven at 375 F and trusted my nose when they smelled just right. About 8-10 minutes. I served these with a side salad for lunch...the reviews were fantastic. Loved by all, kids adults, even the dog! Best part...I didn't have to throw my hard work in the garbage. 

We're so quick to toss out our mistakes; old items we find around our house, things that seem ugly, useless or just plain burnt.  Don't miss out on that positive moment when you can find goodness in an old item; or take something broken, and make it new again. I love to breathe new life into mistakes, eyesores or accidents. This recipe worked out well...if you want to make your own biscuits, please follow this link:


You can pay attention to your biscuits and enjoy them warm at breakfast with melty butter and jam, or burnt and modified into pizza buns at lunch. Regardless, enjoy them!

Thanks for reading! If you have any questions, comments, or you just liked this Big Idea, feel free to comment below. 

Tuesday, 10 January 2017

Homemade Tea Biscuits

There are many reasons to make homemade tea biscuits. I make them as a family tradition.


My son is a biscuit addict. We have them at least once a week. Usually Sunday breakfast. I serve biscuits with fruit, cheese and homemade jam. So delicious. 

My kids eat them in their lunches, as sandwiches, mini pizzas and have them for breakfast as egg sandwiches. If I'm serving biscuits, the kids are in!!

I'm pretty sure I have perfected the ancient art of biscuit making (If I do say so, myself). I used to make them with my grandmother, as a child. She whipped them up without ever looking at a recipe; almost daily. We would cut biscuits with a glass, I loved listening to the puff of air as it escaped and watching them fall out of the glass onto the counter top.  I loved the intoxicating smell of fresh biscuits and the melting warm butter as they were served my favourite way...with molasses. I didn't spend much time with my grandmother when I was young; these memories are as a result, forever cemented in my brain. 

I don't have her original recipe and I'm sure hers probably contained shortening or margarine, which I don't typically eat. The flavour in these tea biscuits are as close as I have managed to get. It's the process, I have discovered that makes a tea biscuit great, more so than the recipe. 

The trick to a flakey biscuit is folding.  As you roll your dough out, fold, roll again, fold, roll again, fold and roll again, as many times as you desire. This process will create layers in your biscuit. I can assure you...you want layers. 

Homemade Tea Biscuits 

4 cups of Unbleached Flour
3 tbsps of Baking Powder
1 tsp of Salt
1/2 tsp of Sugar
2/3 cup of Butter
2 cups of Milk

Place dry ingredients in a stand mixer, blend with the paddle attachment. 

Cube butter and add to the stand mixer. Blend until it resembles coarse crumbs. 

Create a well in the centre of the biscuit mix. 

Add two cups of milk and mix until just combined. 


Preheat your oven to 400° F

Pour mixture onto a heavily floured surface. It will be rather wet, knead for a moment as you incorporate some of the flour from your worktop. 

When your mixture is no longer sticking to your hands, begin rolling.  

Roll your dough to approximately 1 inch. Fold; then roll back to 1 inch. Repeat this process two or three times. 

When you're ready, cut your biscuits with a glass...or a biscuit cutter. 

A large glass will cut approximately 15 biscuits, a smaller cutter will give you closer to 24. 

Place on a parchment lined cookie sheet and bake for 15-20 minutes. 

Allow a few moments to cool before you dig in!!  Be sure to fully cool before freezing. They will last several days on the counter top, in an air tight container; unless you have a son like mine. We never have biscuits around the house for more than 48 hours! 

If you liked this big idea, try making them with someone you love. Feel free to comment below!!