Search This Blog

Sunday 29 July 2018

Slow Play Sunday Morning Gluten Free Pancakes


Yum!  That’s where I’m going start this blog...Yum!  My kids love pancakes, who doesn’t? They love fluffy pancakes made from all purpose flour; again, who doesn’t?  In an effort to increase my family’s fibre intake, however, I have been playing with alternative flours.  I have to be honest, whole wheat flour doesn’t appeal to my kids pallet, also, if I’m changing out my flour, I’d like to reduce the amount of gluten we’re consuming.  No one in my family struggles with gluten but there have been so many documented health problems related to mass wheat production and gluten issues in today’s society, I feel like a reduction is not going to hurt anyone in my household.  They can still have their Mac N’ Cheese but they don’t need to be consuming gluten three times a day.  I’m a firm believer in the old mantra “Moderation is the key.”

Oat flour is delicious, made from a whole grain; higher in protein and healthy fats and lower in carbs than many other grains. Oats also contain more soluble fibre than any other grains.  Plus, they’re gluten free.  Not convinced yet?  Oats contain Beta-glucans which have been shown to reduce the risk of heart disease, high cholesterol and high blood pressure.  Also, diets high in fibre show an increase in the appetite controlling substance, Peptide Y-Y.  This chemical sends a message to the brain to tell it when the stomach is full and encourages the body to stop eating.  I researched this flour, which is readily converted to complete many of your favourite all purpose flour recipes and decided that it should find a home in my pancake recipe.  I do find oat flour requires some extra liquid in a recipe than its wheat counterparts, it’s certainly not a straight conversion with wheat flour but there are many resources on line to assist you in this process.

I have been mixing up my dry ingredients ahead of time to reduce my kitchen time and maximize my sleep time.  Sundays have become very busy for us, we often have kids in two different directions by 10am.  A Bit of Convenience goes a long way for me...unfortunately, I trust almost no food manufacturing companies, pre-made muffins and waffles are not an option in my household.  I had to figure something out because I hate feeling stressed on Sunday morning. I have always thrived in slow-playing Sunday.  This relaxing morning sets me up for the busy week ahead.  On meal prep days, I now take a few moments to throw together a mix or a special seasoning in a mason jar.  My pancake mix is always stocked and has a permanent home on my shelf.


I often mix the dry ingredients into the same mason jar that I just dumped into my mixer, as I clean my kitchen.  It takes moments, but moments, when I have them.  The idea of getting up on Sunday and pulling out my flour and baking powder makes me throw a piece of toast into the toaster.


Dry Ingredients:

2 cups of oatmeal flour
1 tsp of sea salt
2 tbsps of cane sugar
4 tsps of baking powder


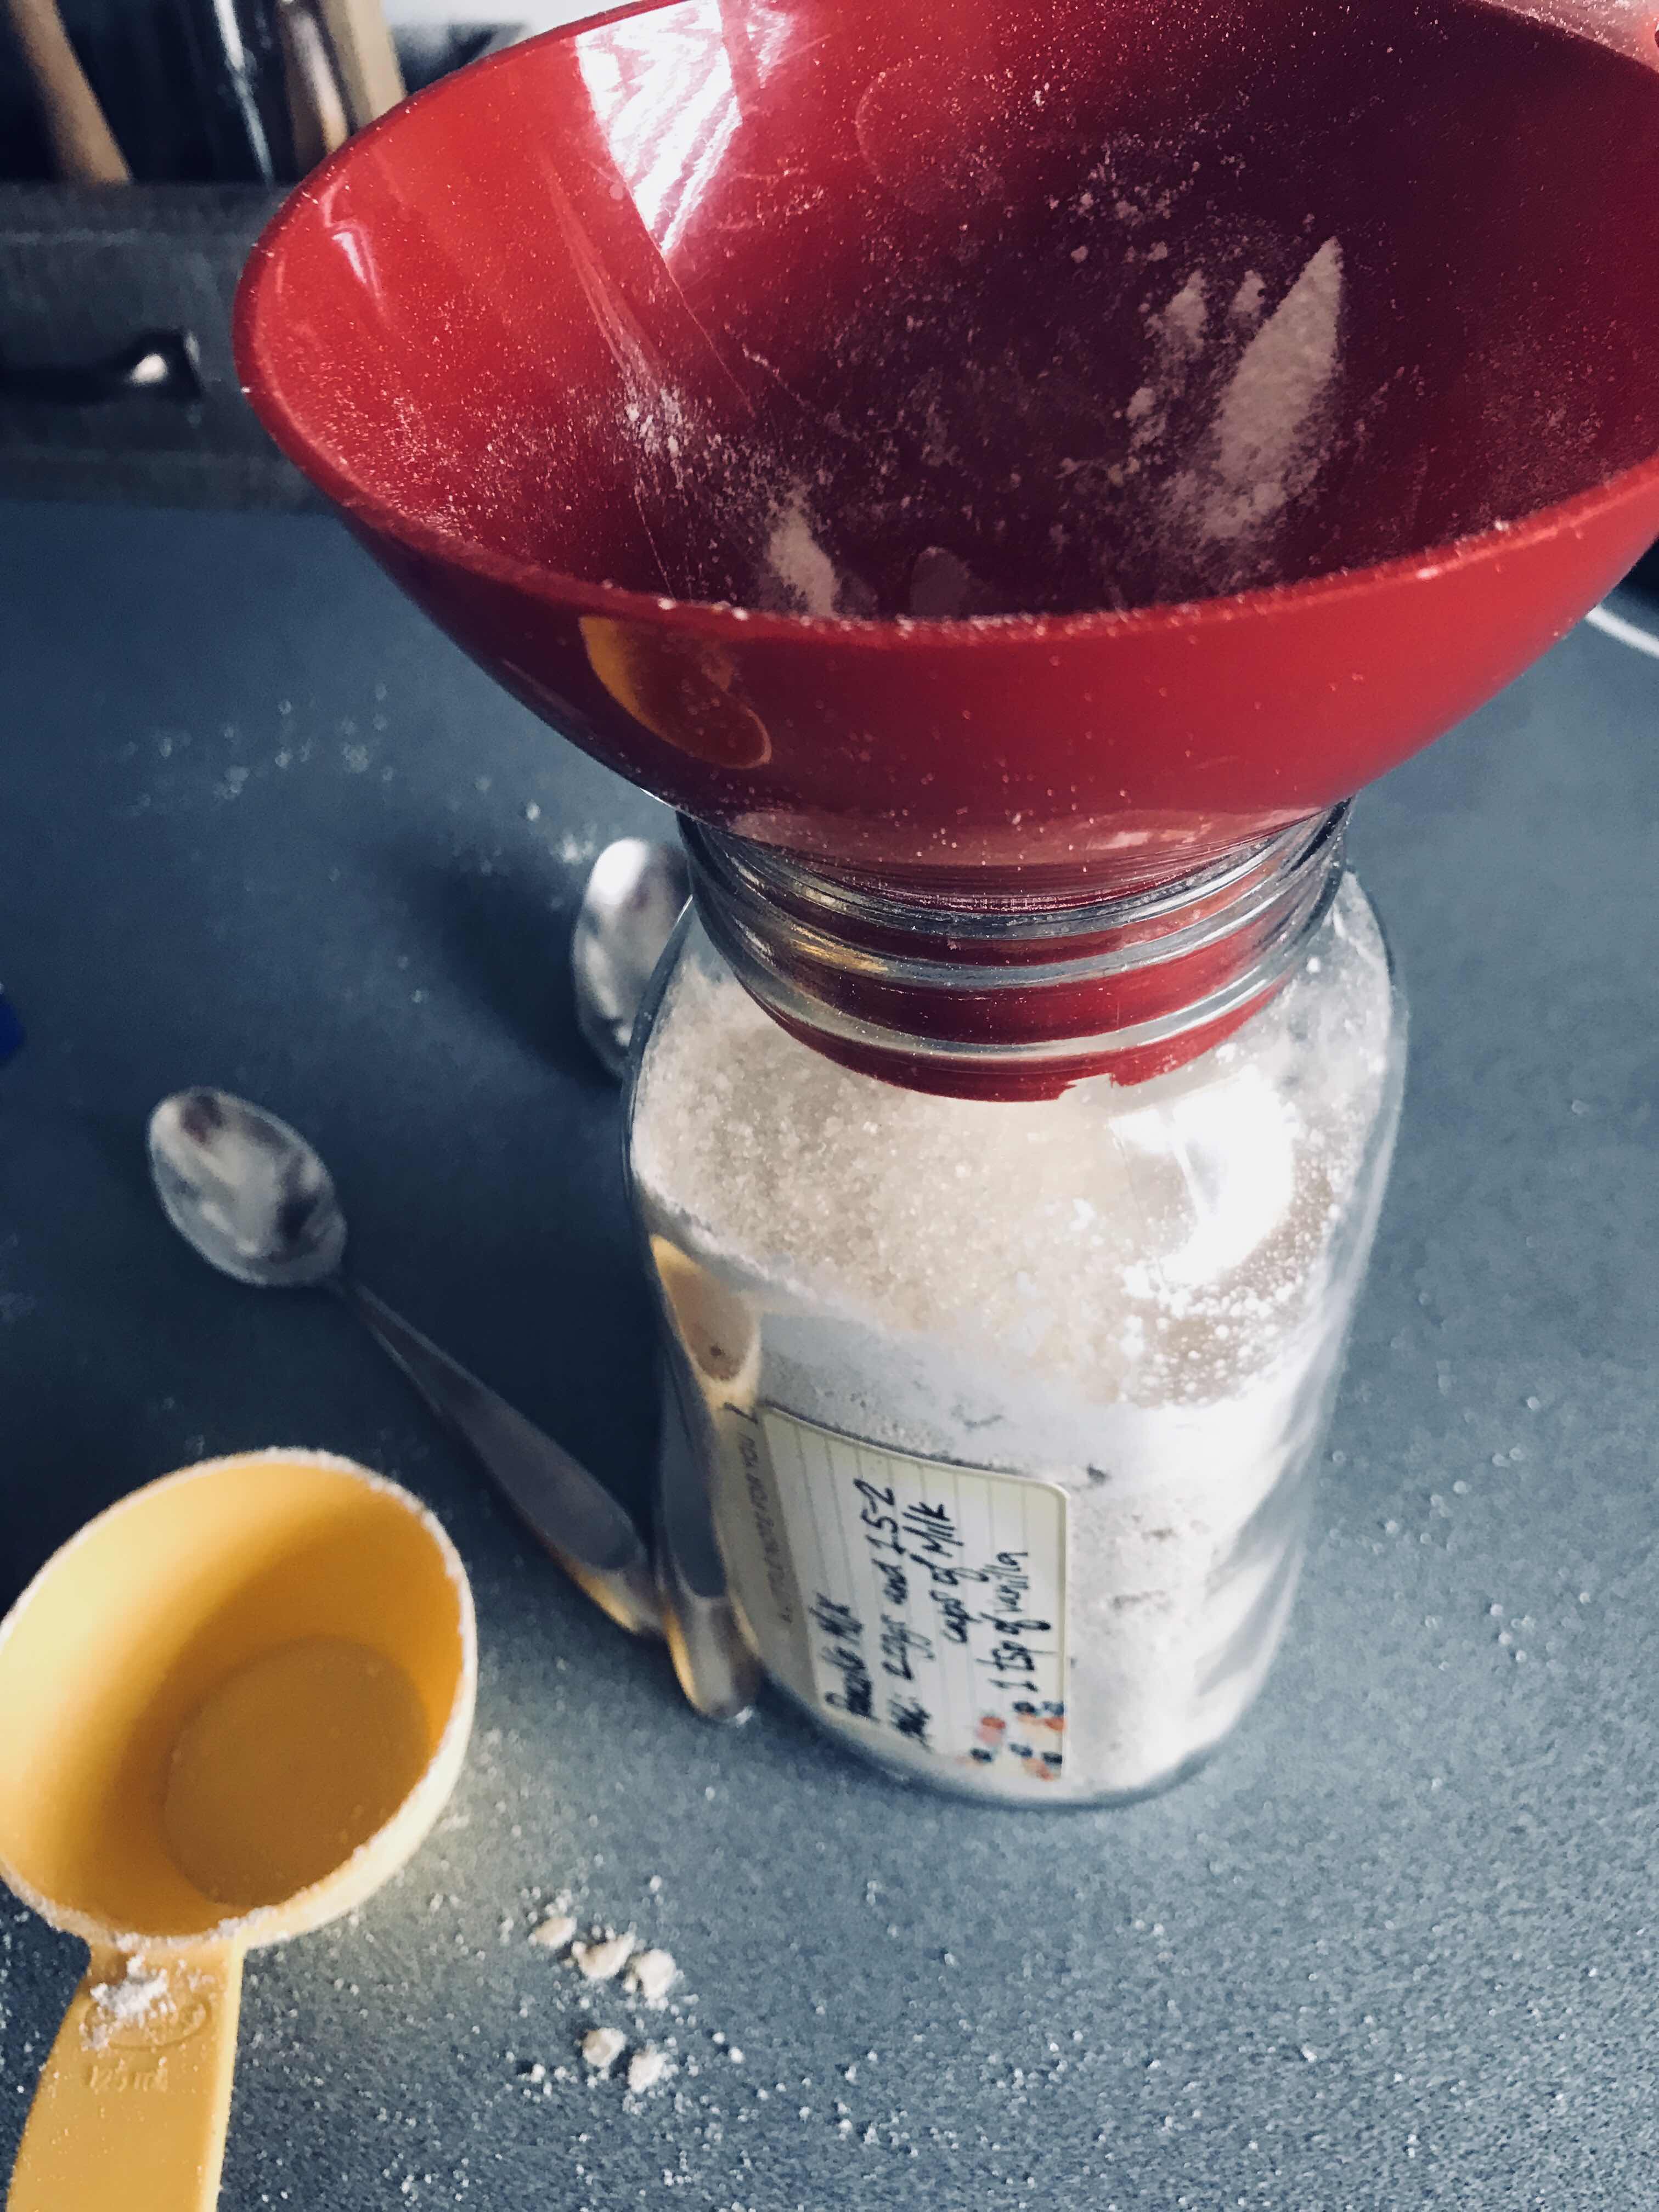
I dump all of those ingredients into a mason jar, twist the lid on and shake. That mason jar finds a place on my shelf until the next time I feel ambitious enough to make some high fibre, satiating pancakes.  When I’m ready to make my pancakes, I add the entire jar of mix along with 2 eggs, 1.5 cups of milk or milk substitute (coconut milk is my personal fave) and on tsp of vanilla to my mixer. As soon as the pancakes are ready, I use a ladle to drop pancakes onto a non-stick pan.


I cook over medium heat.  When bubbles appear on the raw side, its time to flip and cook for 2 more minutes.


I can only cook three pancakes at a time on my pan so I drop them into a casserole dish into my warm oven until I’m ready to serve.


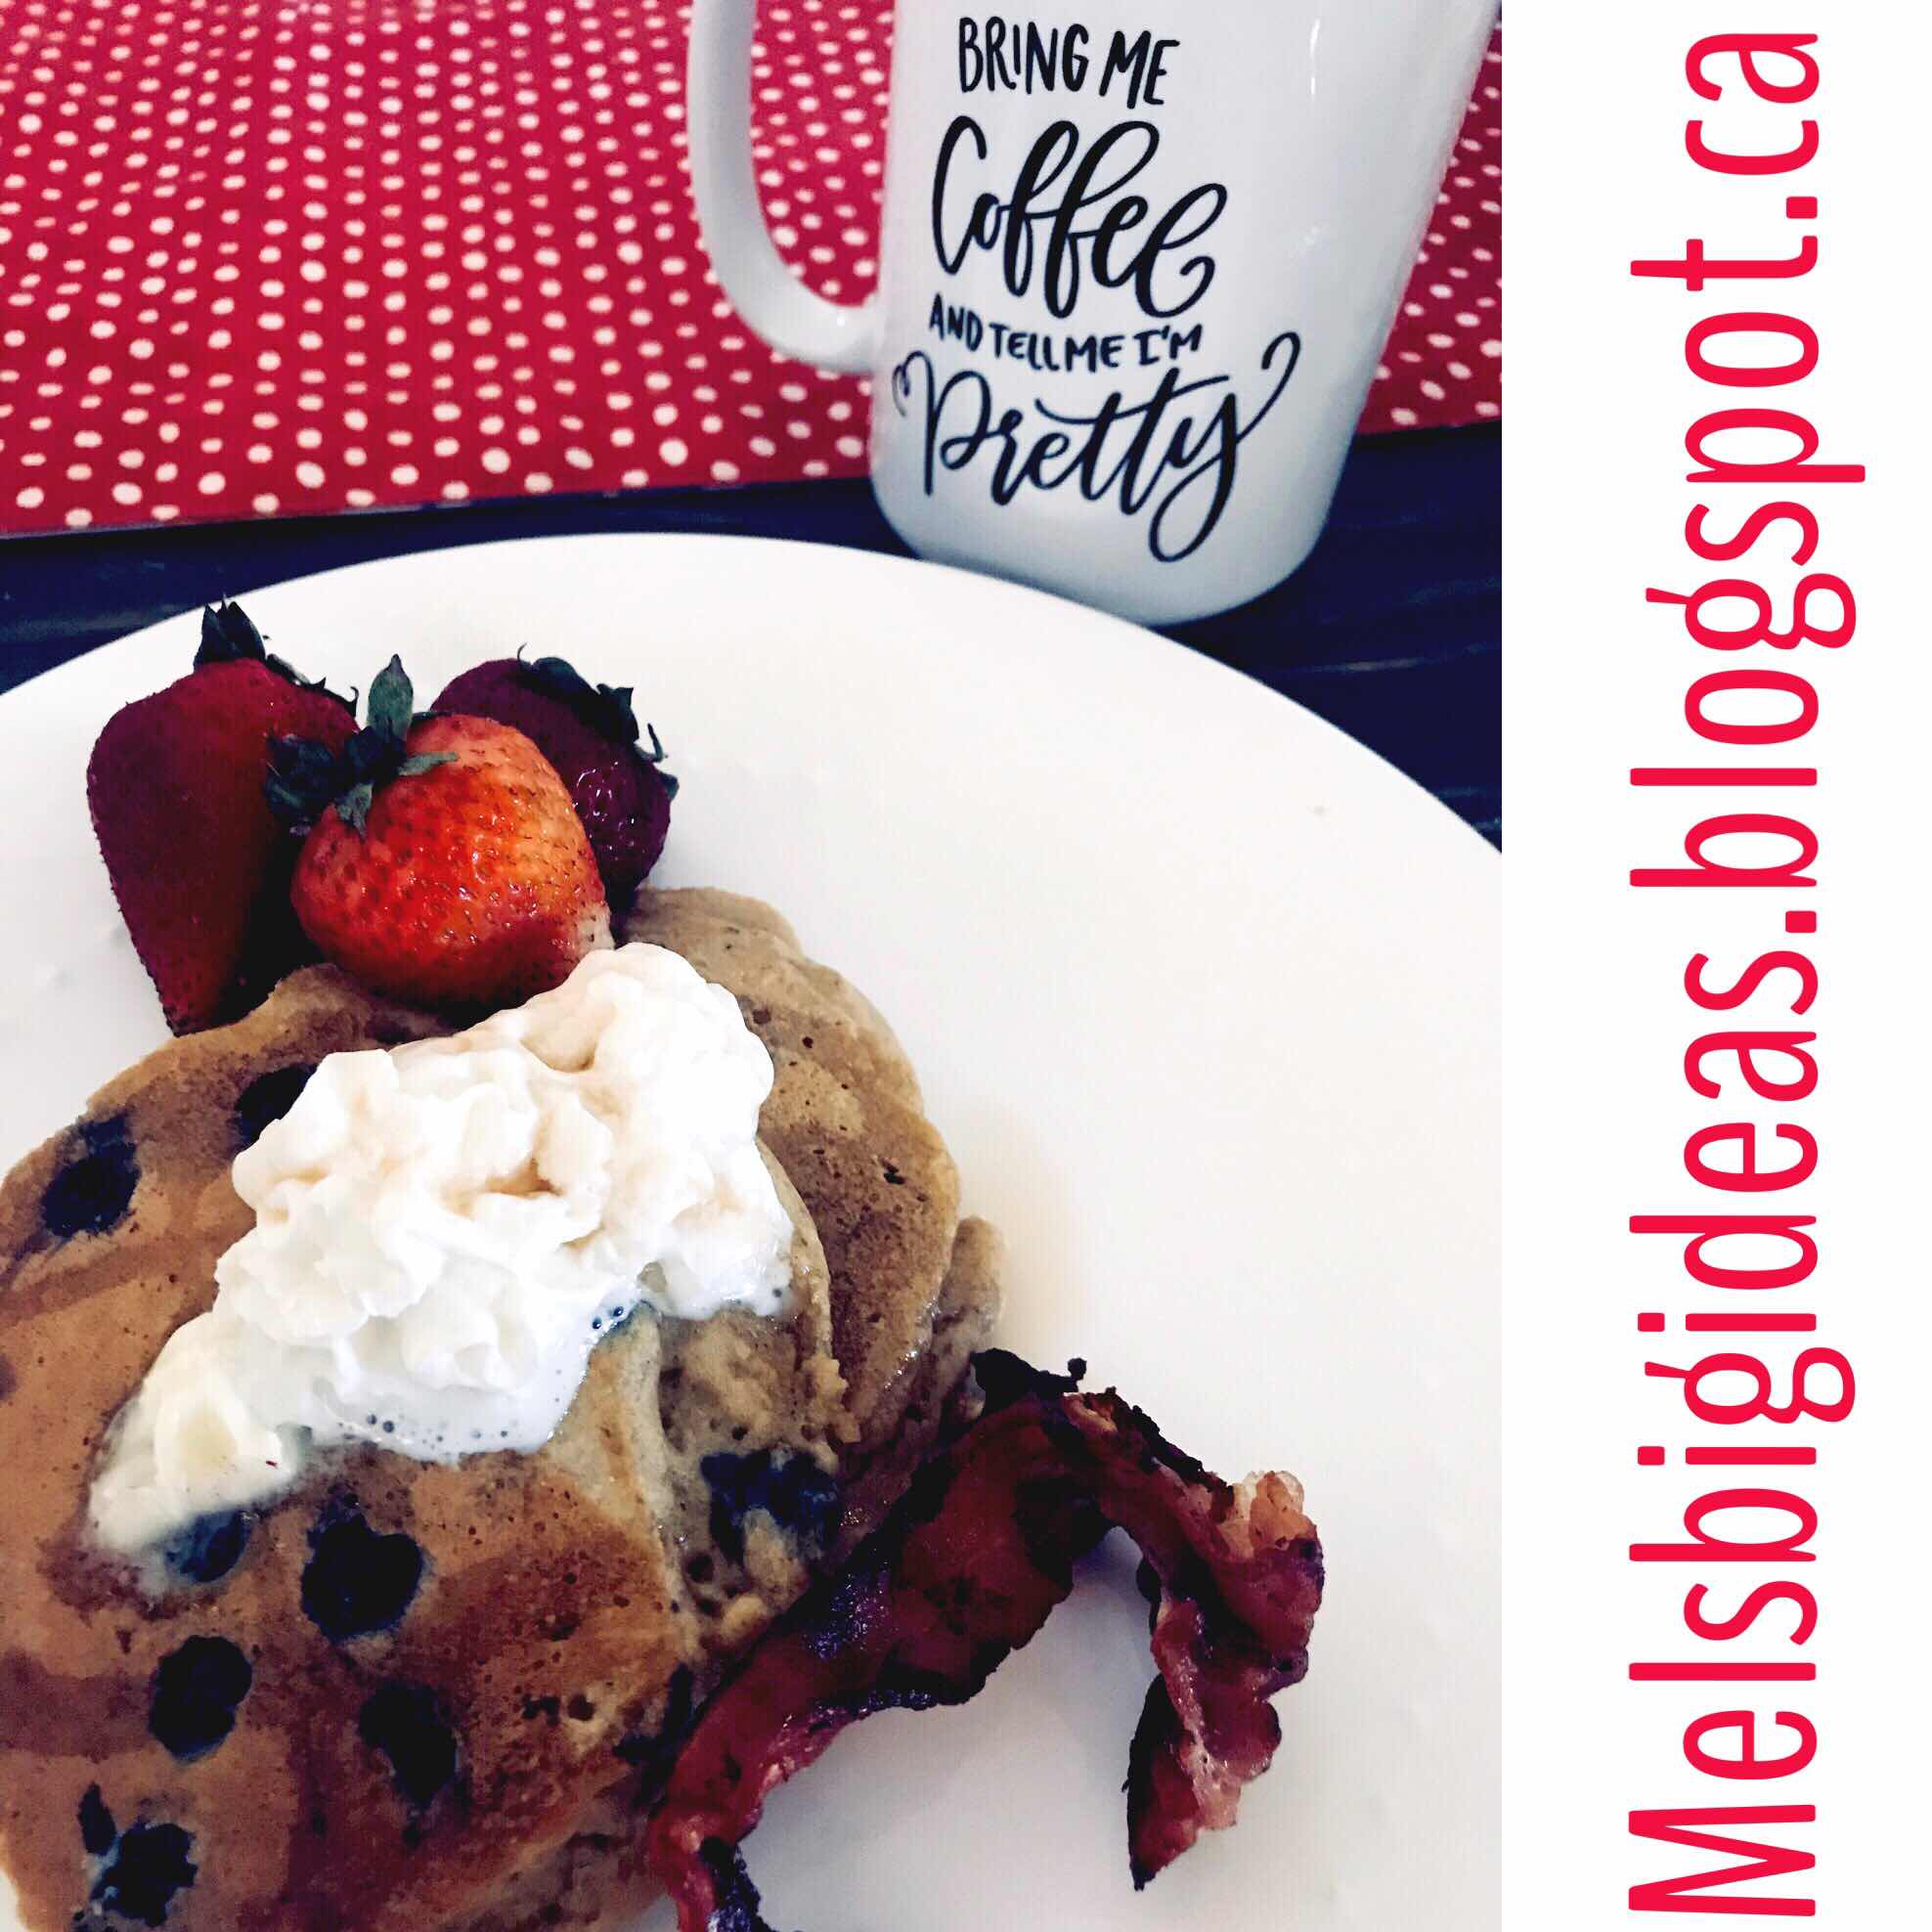
Half Blueberry and Half Plain Pancakes is the winning batch in my household.  The leftover pancakes freeze beautifully and make an even quicker breakfast for later in the week!


That’s it for my Slow Play Sunday Blog!  I hope you’ll try these pancakes, I know I love them and just two makes me feel full for hours.  Thanks for reading! Please feel free to comment below with any questions, concerns or if you just liked this blog!


Friday 27 July 2018

Shabby Inspired Garden Gate


Sometimes you find inspiration in the old, the shabby, the broken down bits of life.  After living in my home for fifteen years, I wanted a bit more curb appeal and I think my hubby and I pulled it off with the addition of this Garden Gate.  My lovely neighbour, Sarah, salvaged this old pine door from the alleyway years ago; she never quite found the right use for it in her home.  The door was an odd size, 29.5 inches wide.  Enter opportunity.  I took the door off of Sarah’s hands one year ago and debated building shelving out of it, turning it into a gigantic picture frame and then it hit me...a new Garden Gate.  We were due for an update, the previous gate sat much further back along our neighbour’s fence line and was very old and shabby. Shabby bad, not shabby good.  There was nothing chic about the old gate.  It was old, run down, the paint was peeling and the latch no longer worked. It was time!


I got out my trusty red paint and between thunderstorms, I added coat after coat.  We primed this old, somewhat damaged door and then added four coats of red and a protective clear coat.  The wonderful thing about shabby decor is that imperfections are a thing of beauty.  Don’t worry about bubbles on your surface, little dings that happen along the way; especially for a piece that is going to find its home outside, this door is going to age and become even more beautiful.  If it doesn’t look more beautiful by next year, I’ll repaint it, or distress it.  


I need to warn you, the one thing that happens if you’re into shabby decor like myself, is that you collect things.  As I said already, I held onto this door for one year while I decided where it might find a home...the door knob that doesn’t fit on any standard door...that was in my basement for two years.  Same problem...the door knob literally doesn’t fit on any door. It didn’t fit on this one either.  Opportunity.  Luckily, I have a crafty Husband that aims to please.  This is a gate, it doesn’t need a functioning door knob, it has a handy dandy latch.  The problem with the door knob was that the interior hardware was much too long for a standard thickness door.  My hubby decided that plumbing pipe fittings were the best way to fill the space between the front and the back of the door knobs.  It was genius and so very shabby.  I love it.  The door knob can be used to pull or push to close but the door knobs don’t actually turn, in this case, that doesn’t matter.  This would not be a perfect fix inside a home but for our purpose, it was ideal.

Next issue with a Garden Gate made from an interior door.  It’s heavy.  We needed a strong structure.  I wanted to mimic Crown Molding with the frame. We had to build an outdoor door jamb that would withstand high winds.


See how shabby my old gate is? It’s the ugly peeling white fence in the background. This new gate has allowed us to reclaim so much space.  My husband built us a very strong structure with posts sunk into the ground, four feet and secured the other posts to our very strong deck.  The braces across the top and to the sides added more strength and stability.  The brace across the top was yet again, an opportunity for decor. We stacked boards to create the appearance of Crown Molding.  It was at this point that I looked at my husband with a worried look and said, “is our lawn mower going to fit through the gate!?!”  It did...here’s a tip, friends, check that before you build your fence gate. An un-mowed lawn wasn’t going to make me popular in my neighbourhood. 


This poor guy, bless his heart for coming along for the ride.  He nailed it with this project.  I couldn’t be happier with the results.  However, I wasn’t done yet!!!  A Shabby Garden Gate needs something really special to complete the look.  Lucky me, I have a bestie that knows where to find all the coolest kitschy decor.


The sign to complete my Garden Gate was too perfect. My girlfriend really gets me.  I’m one of those gals that doesn’t take herself too seriously.  When she saw this metal sign, she called me over for approval and bought it for me as a birthday gift.  I couldn’t be happier. I love it!


Totally perfect.  Totally me.  Worth the bother.


Our easy open latch was tied to a string and my hubby, again, drilled out a space for yet another pipe fitting that the string to pulls through. 


This guy earned a much deserved break...alongside my sister’s healing dog...poor Stevie was attacked by another dog, halfway through our project.  Its been a long week but I’m so pleased with how everything turned out.


Feel free to comment below with any questions, concerns or if you just liked this Big Idea!  Thanks for reading!