Search This Blog

Showing posts with label shabby chic. Show all posts

Friday, 27 July 2018

Shabby Inspired Garden Gate


Sometimes you find inspiration in the old, the shabby, the broken down bits of life.  After living in my home for fifteen years, I wanted a bit more curb appeal and I think my hubby and I pulled it off with the addition of this Garden Gate.  My lovely neighbour, Sarah, salvaged this old pine door from the alleyway years ago; she never quite found the right use for it in her home.  The door was an odd size, 29.5 inches wide.  Enter opportunity.  I took the door off of Sarah’s hands one year ago and debated building shelving out of it, turning it into a gigantic picture frame and then it hit me...a new Garden Gate.  We were due for an update, the previous gate sat much further back along our neighbour’s fence line and was very old and shabby. Shabby bad, not shabby good.  There was nothing chic about the old gate.  It was old, run down, the paint was peeling and the latch no longer worked. It was time!


I got out my trusty red paint and between thunderstorms, I added coat after coat.  We primed this old, somewhat damaged door and then added four coats of red and a protective clear coat.  The wonderful thing about shabby decor is that imperfections are a thing of beauty.  Don’t worry about bubbles on your surface, little dings that happen along the way; especially for a piece that is going to find its home outside, this door is going to age and become even more beautiful.  If it doesn’t look more beautiful by next year, I’ll repaint it, or distress it.  


I need to warn you, the one thing that happens if you’re into shabby decor like myself, is that you collect things.  As I said already, I held onto this door for one year while I decided where it might find a home...the door knob that doesn’t fit on any standard door...that was in my basement for two years.  Same problem...the door knob literally doesn’t fit on any door. It didn’t fit on this one either.  Opportunity.  Luckily, I have a crafty Husband that aims to please.  This is a gate, it doesn’t need a functioning door knob, it has a handy dandy latch.  The problem with the door knob was that the interior hardware was much too long for a standard thickness door.  My hubby decided that plumbing pipe fittings were the best way to fill the space between the front and the back of the door knobs.  It was genius and so very shabby.  I love it.  The door knob can be used to pull or push to close but the door knobs don’t actually turn, in this case, that doesn’t matter.  This would not be a perfect fix inside a home but for our purpose, it was ideal.

Next issue with a Garden Gate made from an interior door.  It’s heavy.  We needed a strong structure.  I wanted to mimic Crown Molding with the frame. We had to build an outdoor door jamb that would withstand high winds.


See how shabby my old gate is? It’s the ugly peeling white fence in the background. This new gate has allowed us to reclaim so much space.  My husband built us a very strong structure with posts sunk into the ground, four feet and secured the other posts to our very strong deck.  The braces across the top and to the sides added more strength and stability.  The brace across the top was yet again, an opportunity for decor. We stacked boards to create the appearance of Crown Molding.  It was at this point that I looked at my husband with a worried look and said, “is our lawn mower going to fit through the gate!?!”  It did...here’s a tip, friends, check that before you build your fence gate. An un-mowed lawn wasn’t going to make me popular in my neighbourhood. 


This poor guy, bless his heart for coming along for the ride.  He nailed it with this project.  I couldn’t be happier with the results.  However, I wasn’t done yet!!!  A Shabby Garden Gate needs something really special to complete the look.  Lucky me, I have a bestie that knows where to find all the coolest kitschy decor.


The sign to complete my Garden Gate was too perfect. My girlfriend really gets me.  I’m one of those gals that doesn’t take herself too seriously.  When she saw this metal sign, she called me over for approval and bought it for me as a birthday gift.  I couldn’t be happier. I love it!


Totally perfect.  Totally me.  Worth the bother.


Our easy open latch was tied to a string and my hubby, again, drilled out a space for yet another pipe fitting that the string to pulls through. 


This guy earned a much deserved break...alongside my sister’s healing dog...poor Stevie was attacked by another dog, halfway through our project.  Its been a long week but I’m so pleased with how everything turned out.


Feel free to comment below with any questions, concerns or if you just liked this Big Idea!  Thanks for reading!


Tuesday, 27 June 2017

Long Weekend Project. Installing a Ceiling.


I love a weekend project!!!  I love a long weekend project even more!!!  May Long Weekend, we guarded our schedule. No plans, except to stay home, work hard and make a big change in our home. My hubby and I have travelled to New Orleans twice. On both trips, I was so inspired by "NOLA style."  I have always loved shabby chic decor, New Orleans takes shabby chic to a whole other level. It's broken, it's old, it's water damaged and possesses a level of splendour...fit for royalty. Old School "French Decadence." I love it! 

After our first trip to New Orleans, I painted all of our kitchen cabinets white and ordered crystal knobs on Etsy. $1 each and they were real glass...Nice work right? When I walk into my kitchen in the morning, I admire the prisms on the kitchen floor. Beautiful. These door knobs bring me joy. 

After our most recent trip, to NOLA, I added wallpaper the ceiling to the list. Wallpaper the ceiling? Nuts right? Totally worth the effort. I'm beyond thrilled with the result.

My kitchen ceiling had problems. Big Problems. Popcorn texture with fluorescent lighting. The kind of lighting you'd find in an office. I have avoided working on the ceiling since we bought the house, fourteen years ago. I was terrified of what we would find underneath the two office banks of fluorescent lighting, featured on my ceiling. There would probably be holes, maybe different ceiling textures, different ceiling colours? I had imagined a list of potential problems as long as my arm. A word of advice...don't do this. Just look. Unscrew the light fixture. See what's there. You can always just put it back up. I could have saved myself some work had I done that, though I would not nearly be as thrilled with the result as I am currently. Underneath my ugly fluorescent lights were two standard light fixture boxes. One for each light bank. I could have installed any type of lighting into the lighting box and the popcorn ceiling would have been undisturbed. We did have to move one, but that would have meant a minor repair to the popcorn ceiling, cutting a new hole for a secondary box and pulling some wires. Simple. 


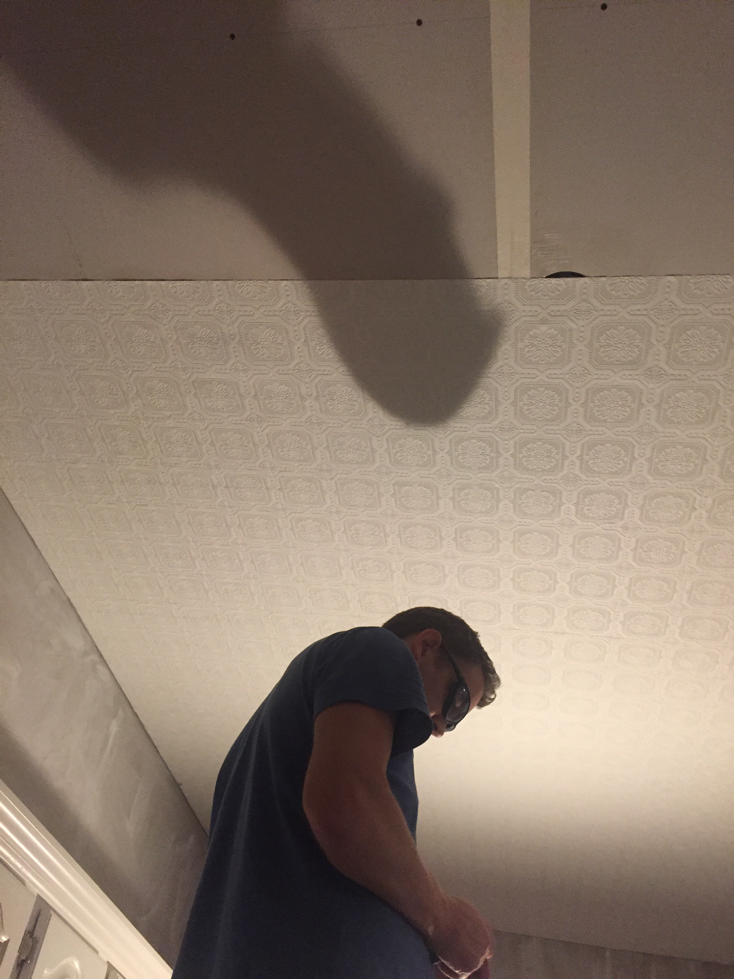
It was out of my fear, that a plot to remove the fluorescent lighting was born. Our kitchen ceiling is not attached to any other part of the house's ceiling. We knew that we could install a "feature" and not have to carry it through the rest of the house. After many discussions, my husband and I decided to put a textured wallpaper onto our ceiling. The texture on the paintable wallpaper that we found, mimicked a tin tile. As you may or may not know, hatching an idea is only the first part of a plan. Actually installing it and deciding upon how to install it is the more difficult aspect of the planning process. 

Our ceiling is sloped, it is almost 12' high on one side of the room and about 8.5 or 9' on the other. That's high, really high! We opted to put drywall directly on top of the popcorn ceiling. I'm 5' tall. This was going to be challenging!

Enter Drywall Lift. Wow! This saved our backs and a lot of time. We rented it for four hours at Home Depot for approximately $40. Best money spent throughout the process of this reno! It was simple to use and saved our old backs! To use the drywall lift, you place your sheet of drywall onto the lift. You then turn a wheel which lifts the sheet of drywall and levels it with the ceiling. Turn the wheel until the sheet perfectly meets up with the ceiling and then screw it into the existing ceiling. So simple. If you've already marked the studs on the ceiling, you line your drywall screws up with your markings. Even more simple. 


In order to save money, we made sure all prep work was completed before picking up our Drywall Lift. 


Ok. That joke never gets old. Stud Finder!!!!  I'm sure my hubby is tired of it! I have always claimed to be a "stud finder," that's how I picked him! Regardless as to where my talents lay, he always insists on using the little yellow thing that beeps and lights up to find studs. He marked them right onto the ceiling with a marker to use as a reference when screwing the new drywall onto the ceiling. He also picked up a nifty little lighting cutter to cut out light fixtures. The lighting cutter looked like a compass and cut perfect holes into the drywall which fit over the lighting boxes. All of this work was complete before the Drywall Lift was picked up. 


I also started priming walls as a new ceiling deserves a new wall colour. Currently, my favourite colour is Vintage White. If that even counts as a colour!  I'm slowly painting the whole house to white and grey. I'll add additional colours with beautiful accents. Like my teal coffee maker, my red Kitchen Aid or funky throw pillows.

Once the drywall boards were installed, we used drywall tape to cover seams, after the tape was dry, we installed the wallpaper. Maybe you know this about me, maybe you don't? Instructions aren't fully my thing. Sometimes there's just a better way. Anytime my husband and I install wallpaper, we use wall adhesive, pictured below, there's no wetting preglued sheets of paper for me!!!!  Way too messy!!! I love this product and use it all of the time, even with preglued paper. You simply paint the surface and the back of the wallpaper and then position accordingly. It dries quickly but you still have some time to push out air bubbles or reposition your paper. Similar to water installation but less drippy, sticky and wet. 


When painting on your glue, you're going to need a long clean space. The hallway was just perfect! We glued our sheets horizontally across the ceiling, right over the lighting boxes. Holes to accommodate lighting were marked and cut, after the fact. 


This was certainly tiring work. The long weekend I budgeted to complete the job was nuts. Glue needs time to dry, especially if you're painting your ceiling grey. We had to allow 24 hours for the glue to cure before painting, which gave us time to stop, enjoy our kids and attend a family dinner. A girl's gotta have some fun!


We chose a grey paint for the ceiling. When painting a ceiling, you need a relatively thick paint, otherwise it drips. Also, when you're working with texture, you require a high pile roller. However, even with a high pile roller, it was challenging to achieve full coverage. Get ready for some hard work, many coats of paint and perhaps even stippling with a paint brush while standing on the top rung of the ladder. 


Work hard, be patient (I totally wasn't), enjoy time with someone you love and this job will make you feel accomplished by the time you're done. I'm so happy with my NOLA Kitchen. 


Please feel free to comment below if you have any concerns, questions or you just enjoyed this Big Idea. Thanks for reading!!


Sunday, 14 May 2017

Where Problems Become Details, My Own Creative Space


My husband and I are always tearing something apart in our house and as I prepare to take on a ceiling and lighting job in our kitchen, next week, I'm reflecting on our last renovation. You may or may not know this about me; I'm a creative mess. I love to make things. All things. Anything! 


See!?! Total Creative Mess!!   I've been scrapbooking for years. I'm always working on one project or another and until recently, I was working in a pretty uninspiring space. A space that had almost no storage and a giant bed in the middle of it. A bed I covered with layouts, ribbons, glue, scissors. Heaven forbid I'd have a guest. I'd have to hide everything away! Lose momentum on projects, or lose the projects all together! It came from this frustration that my husband and I decided to upgrade my creative space. 


The basement bedroom has a tiny window. An itty bitty window that allows minimal light into a rather large basement room. There was a huge, oversized closet in the room that inefficiently housed most of my supplies. It jutted out from the wall and covered half of the window. As enlarging the window was not an option at this point, my husband decided our best approach was to remove the closet. Which might seem nuts but it actually worked out quite well once we dealt with headaches related to the design of the space. The closet was placed where it was, as it hid the duct work and air vents that ran from one end of house to the other. We opted to box the duct work in and wall paper the wall as a feature to house my desk and the IKEA storage unit we purchased for my supplies. 


There was a support post built into one of the closet walls. We structurally needed to leave that where it was and opted to distress pallet boards to build it in. It became a feature as well. A problem became a detail. 


These details or problems add character to a space and working in an older home, you find problems around every corner!


My Scrapbooking Room still needed to be a functional guest room, so we added a beautiful Murphy Bed, from Costco's Bestar Line. Alongside the bed we ordered and installed storage units, from the same line.  This was truly the best solution. I now have the entire floor space for large projects (like my current one...painting and distressing a dining table and chairs). 


This project worked out very well. I now have an inspiring space with plenty of room to move around! A place to sleep and some extra storage for my guests. Just what I needed!!!

I'll keep you all posted with future adventures in my old house...full of problems...oops! I mean details! 

Thanks for reading!!! Please feel free to comment below with any questions, concerns, or if you just liked this Big Idea!!!