Search This Blog

Showing posts with label scrapbooking. Show all posts

Tuesday, 13 February 2018

Eat Your Heart Out! Valentine Deliciousness!


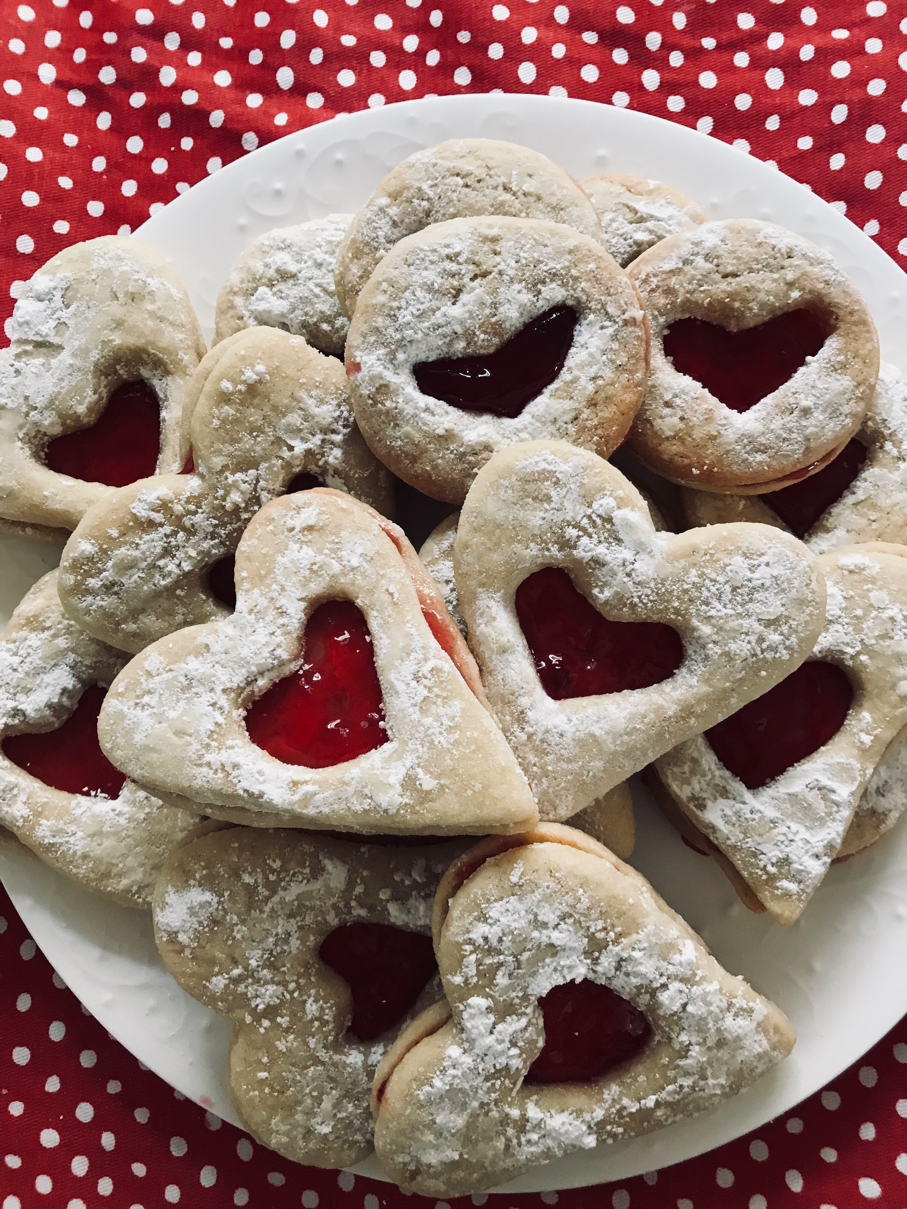
Yet another Valentine’s Day and more homemade valentines for my son’s class.  He’s a happy boy again this year!  Drew and I made our famous sugar cookies for his friends and packaged them up with his Valentine wishes.  A classic wish from an 11 year old boy.... “From: Drew.”  One of these days I’m hoping he becomes more verbose, but for now this will do!! We very sensibly froze the left over red icing from his Mario Muffin Cupcakes, after his birthday; yesterday, we thawed it out to sandwich between two of our heart shaped cookies. 

The beauty of a classic Sugar Cookie recipe is it’s entirely versatile. Not only did I need to make treats for Drew’s class; I wanted to drop some goodies off to friends and prepare some treats for my thirteen year old daughter’s “Single Ladies Sleepover” on Valentine’s Day. Single Ladies Sleepover!?! Sometimes you just roll with your child’s requests.  This mama is rolling...and secretly very happy that she’s not sneaking out to see boys on Valentine’s Day. Girl time sounds perfect to me!!!


Mel and Drew’s Famous Sugar Cookies

1 Cup of Salted Butter
1 and a 1/2 Cups of Granulated Sugar
1/2 Cup of Brown Sugar
2 Eggs
2 Tsp of Baking Powder
3 and a 1/2 Cups of Flour
2 tbsp of Milk
1 tsp of Vanilla
1/2 tsp Salt


Cream wet ingredients.

Blend dry ingredients.  Slowly add dry ingredients to wet.  

Refrigerate for at least two hours.

When ready to start baking, preheat the oven to 350 F. 

Roll out dough to 1/8”, on a well floured surface.  

Use a cookie cutter to cut shapes and bake in the oven for 12-15 minutes, until golden brown on edges.  

Allow cookies to cool on the cookie sheet for 2 minutes and then remove to a cooling rack.

If adding icing sugar to cookies, add after cookies have cooled on the pan for 2 minutes and then transfer to a cooling rack.

Makes approximately 48 cookies. 


After your cookies have cooled, ice the bottom of one of them, generously.


Press together and Voila!!  Cookie sandwich!!  You can also use jam between your cookies, I used my homemade cherry jelly on some of my goodies.  Please excuse my craft nails...I’ve painting green...lots of green...


Treat Toppers

If you’re making Treat Toppers, you can follow the following instructions. First of all, choose a reasealable bag that fits your treat.  Measure the width of your bag and map out your plan on a white piece of card stock.  I typically make toppers 3” tall, with a seam at 1.5”.  The bags I’m working with are 4” wide.


Next design your topper, if you’re writing on both sides, one side will be upside down as you’re creating a folding seam in the centre.


Once your toppers are complete, you may now photocopy onto any colour of card stock you choose.  


I photocopied onto grey card stock.  Next, I trimmed the excess off of the edges and then I used a scoring blade to mark the toppers at 1.5”.  I used my pre-drawn lines to cut them to 4” wide.


I adore inking, I love the dimension it adds to any project.  In order to ink, you simply drag the edges of your project across an ink pad.


Feel free to add colour!!  You can do this before or after photocopying.  I used a red glaze pen to roughly colour the hearts, after photocopying as I enjoy the added texture and interest it provides. A glaze pen looks similar to a gel pen, until you use it!!!  A glaze pen’s ink dries raised and shiny. Finally, fold toppers over the bags and staple.


I enjoy the staples from the Tim Holtz Tiny Attacher.  They’re tea bag sized and so super cute!!

Thanks for reading.  Feel free to comment below if you have any questions, concerns or just like this big idea!!  Happy Valentine’s Day Everyone!


Thursday, 25 May 2017

Calendar Making Woes and Joys


I have a "Love / Hate" relationship with my calendars. I have been making them since my daughter turned 1. She's 12 now. That's a lot of calendars and a ton of scrapbooking!  The first year I made them, I decided the month before Christmas that I was going to make 5 handmade calendars for the grandparents, great grandparents and one for myself. I had no idea of the time and stress this gift might cause. Even those simple calendars required me working day and night. My husband became an over night scrapbooking sensation, popping eyelets through pages and stamping the month names onto the calendars...even SPETEMBER (his mom got that calendar). My initial intention with calendars was to make one, a highlight of MacLean's first year. They were so well received that I keep making new ones...every year. 


These calendars highlight special moments that occurred in the previous year, during that month. We had a fantastic 2016! A new puppy, growing children, my nephews starting preschool and kindergarten. I was so excited about how the calendars turned out this year! Each layout, more special than the last. This year's calendars were equally as pressed for time as the first simple one I sat down to do in 2005, the technique, however, has improved. 


I use many different scrapbooking techniques in my calendars. Each page begins with a photo, from there, I draw out colours, find coordinating papers and look for inspiration. I often find inspiration at a local scrapbooking store, The Scrapyard, its a vortex of creativity. They offer many classes and have the most wonderful scrapbookers on site. There is always someone around, willing to offer you some helpful advice or to teach you the latest technique. 


When I make calendar layouts, I always leave the brand strip on the bottom of the page. I bind the calendars myself and find that this extra bit of paper helps with reinforcing your coil. I later choose a coordinating paper that I can fold over the front and back of the layout to ensure a strong reinforcement. This is challenging. Not reinforcing. Mixing your patterns. The blank calendar page gets glued onto the back of your layout. Its not always easy to match the black and orange layout to whatever colour scheme you chose for your November layout. Neutral patterns come in handy for that!


As you can see from this photo. I opted for a black and white wood grain print, which works well with my November layout and even better with the October prints!

This year, I used so many new photo editing apps. These added even more detail and interest to my layouts. I've always loved the instagram filters but there are so many other special apps out there. A few of my favourites are "A Beautiful Mess," which is an amazing collage app and "Waterlogue," with this app you have the ability to change your photos into watercolour "paintings." A Beautiful Mess allows you to put photos into collage frames, add filters, wording, images and borders. Waterlogue, has so many different styles of watercolour that you can create photos that look like historic artworks or even comic book frames. When these two apps are used in conjunction with each other, you can create interesting pieces like this...


When you're rushing to create a Halloween page, having the ability to print a photo layout like this one, on an 8.5 X 11 photo page, makes it very quick to create a 12 X 12 scrapbooking layout. As you can imagine, most of the layout is covered, you only have a few details to add to your hybrid digital / handmade scrapbooking piece. 

Typically, the last layout in my calendar is a family photo in front of our tree. I was renovating for guests prior to Christmas and designing a calendar. Decorating my tree would have to come after I mailed the calendars out to two sets of grandparents. I found inspiration for my December layout in an old photo of my brother and I at Christmas and an old Christmas book, T'was the Night Before Christmas. This copy of the classic Christmas story belonged to my children's great grandmother. I couldn't help but photocopy the image of Santa in the chimney onto cardstock and fussy cut it, to add as an important vintage element on my holiday layout. I just love the way it turned out. 


These gifts are so personal, my mother in law's calendar features very different photos than the one for my mom. My mother's calendar is drenched with photos of her grandchildren (my neice and nephews that live so close to me). My own often features family photos of my little family unit of four. All of the layouts, however, are made from the same papers and elements and come together quickly. The first one taking 2-3 hours to create and the final one, 15 to 20 minutes to recreate. 


I hope after reading this article, you find some inspiration to sit down with your photos and make something beautiful for someone you love. This project always causes stress because I never start it early enough. I'll never stop making them though, I enjoy them way too much. 

Thanks for reading!!  Feel free to comment below with any questions or concerns, or if you just liked this Big Idea. 

Sunday, 14 May 2017

Where Problems Become Details, My Own Creative Space


My husband and I are always tearing something apart in our house and as I prepare to take on a ceiling and lighting job in our kitchen, next week, I'm reflecting on our last renovation. You may or may not know this about me; I'm a creative mess. I love to make things. All things. Anything! 


See!?! Total Creative Mess!!   I've been scrapbooking for years. I'm always working on one project or another and until recently, I was working in a pretty uninspiring space. A space that had almost no storage and a giant bed in the middle of it. A bed I covered with layouts, ribbons, glue, scissors. Heaven forbid I'd have a guest. I'd have to hide everything away! Lose momentum on projects, or lose the projects all together! It came from this frustration that my husband and I decided to upgrade my creative space. 


The basement bedroom has a tiny window. An itty bitty window that allows minimal light into a rather large basement room. There was a huge, oversized closet in the room that inefficiently housed most of my supplies. It jutted out from the wall and covered half of the window. As enlarging the window was not an option at this point, my husband decided our best approach was to remove the closet. Which might seem nuts but it actually worked out quite well once we dealt with headaches related to the design of the space. The closet was placed where it was, as it hid the duct work and air vents that ran from one end of house to the other. We opted to box the duct work in and wall paper the wall as a feature to house my desk and the IKEA storage unit we purchased for my supplies. 


There was a support post built into one of the closet walls. We structurally needed to leave that where it was and opted to distress pallet boards to build it in. It became a feature as well. A problem became a detail. 


These details or problems add character to a space and working in an older home, you find problems around every corner!


My Scrapbooking Room still needed to be a functional guest room, so we added a beautiful Murphy Bed, from Costco's Bestar Line. Alongside the bed we ordered and installed storage units, from the same line.  This was truly the best solution. I now have the entire floor space for large projects (like my current one...painting and distressing a dining table and chairs). 


This project worked out very well. I now have an inspiring space with plenty of room to move around! A place to sleep and some extra storage for my guests. Just what I needed!!!

I'll keep you all posted with future adventures in my old house...full of problems...oops! I mean details! 

Thanks for reading!!! Please feel free to comment below with any questions, concerns, or if you just liked this Big Idea!!!

Tuesday, 11 April 2017

Easter Bunnies Everywhere


Easter has invaded my home. I love to switch things up decor-wise and I'm a total sucker for a holiday! These two love birds (bunnies?) have set up camp on my dining table, my dish towels are pink and green, even my bathroom looks like this...


Yup. If you know me, you'll realize those are my Christmas "Hope" letters, minus the "E." Do my guests appreciate these little seasonal nods? Probably not, they may not even notice, but I do. They bring me joy, so I'm going to keep these accents around! 

On that note, I've just switched over my Valentine's Printer's Tray to my very favourite lay out. I love the Easter Tray because my kids were so little and sweet when I made it. 


So good riddance Valentine's! 


I pulled all of my Valentine memories out of my Tray, packed them into the ziplock that I keep in my scrapbooking room and switched to Easter. 


Those of you that have read my last article on the Printer's Tray know that the only permanent embellishment on there is the lace border. Everything else switches out. 


All of the small layouts in the compartments are tightly fit and feature a tab for easy removal. The borders are either sticker borders or have bits of Velcro connected to the back. 


As you can see, most of the layouts are decorated with Easter themed paper. I printed all photos in sepia and added orange details with a marker to coordinate with the papers. 


I also used a series of stamps with brown archival ink. The tabs are attached with Tom Holtz Tiny Attacher Staples...which are pretty much a tea bag staple.  Super cute!!  I never use just one. 2 or even 3 are much more decorative. 


I added details to my son's T-shirt. I had these adorable flocked rub on transfers, which were perfect for this project!  


I added this cupcake decoration to the printer Tray handle with appropriately coloured ribbon. Voila! Easter Decor!  Hopefully this inspires you to go out and create!

If you have any questions or you just liked this Big Idea, feel free to comment below. Thanks for reading!!

Wednesday, 8 February 2017

Valentine's Day Printer's Tray


Valentine's Day is just around the corner. Time to  heart-ify my house! I made this Printer's Tray, years ago!!!  I change it seasonally. Right now it hangs on my wall with lots of smoochy pictures!!

I love having the ability to change out my decor for holidays and seasons. My undecorated printer's tray was an investment and it sat, undecorated for quite some time. I had a hard time committing to a theme, to something I wanted on my wall, year-round. That's when I considered the possibility of using temporary glue dots, Velcro and tightly fitting pictures in the small compartments of this Tray. 

A Printer's Tray was traditionally used to hold moveable type and keep the Printer organized. Today, we see them on walls in Shabby Decor, filled with memories, mementos and pictures. A nod to the past. 

Today, I'm switching from a Halloween themed tray to a Valentine's Tray. 


The only fixed detail on my Tray is the lace, which I hotglued because, let's face it, lace goes with everything! (That may or may not be a matter of personal opinion). 

When attaching ribbons, I use small pieces of Velcro, or adhesive ribbons. 


 I keep all of my elements in a box, in my scrapbooking room, waiting to be changed out for holidays and seasons. 


The divided compartments in a Printer's Tray leave a great opportunity for tiny scrapbooking layouts. All layouts are measured and cut to size, each layout includes a tab for easy removal. The tabs are made from washi tape or ribbon. 


Each layout features a photo, an on-theme paper, stickers and demonstrate a number of scrapbooking techniques, from inking, to sanding and stamping. When completing a project like this, one also has the opportunity to include 3 Dimensional objects. Like the bottle feature in this layout...


As my project hangs on the wall, close to a high traffic area, a small, removable glue dot is used to keep the bottle in place. 

A handle is not only the means by which you hang your project on the wall, it holds great potential for decoration!!  When filled with my Valentines layouts, my handle is decorated with beautiful ribbons and bows. Other seasons and holidays feature decorative toothpicks and beads. Your options are limited only by your imagination. 


Next it's time to pull out my heart shaped candles and tea towels!!  I'm ready for Valentine's Day. I just love switching out of spooky elements to these loving memories. I can't think anything better than kisses and memories to adorn the walls of my home. 

If you have any questions or you just liked this Big Idea, please feel free to comment below. Thanks for reading!!