Search This Blog

Tuesday, 27 June 2017

Long Weekend Project. Installing a Ceiling.


I love a weekend project!!!  I love a long weekend project even more!!!  May Long Weekend, we guarded our schedule. No plans, except to stay home, work hard and make a big change in our home. My hubby and I have travelled to New Orleans twice. On both trips, I was so inspired by "NOLA style."  I have always loved shabby chic decor, New Orleans takes shabby chic to a whole other level. It's broken, it's old, it's water damaged and possesses a level of splendour...fit for royalty. Old School "French Decadence." I love it! 

After our first trip to New Orleans, I painted all of our kitchen cabinets white and ordered crystal knobs on Etsy. $1 each and they were real glass...Nice work right? When I walk into my kitchen in the morning, I admire the prisms on the kitchen floor. Beautiful. These door knobs bring me joy. 

After our most recent trip, to NOLA, I added wallpaper the ceiling to the list. Wallpaper the ceiling? Nuts right? Totally worth the effort. I'm beyond thrilled with the result.

My kitchen ceiling had problems. Big Problems. Popcorn texture with fluorescent lighting. The kind of lighting you'd find in an office. I have avoided working on the ceiling since we bought the house, fourteen years ago. I was terrified of what we would find underneath the two office banks of fluorescent lighting, featured on my ceiling. There would probably be holes, maybe different ceiling textures, different ceiling colours? I had imagined a list of potential problems as long as my arm. A word of advice...don't do this. Just look. Unscrew the light fixture. See what's there. You can always just put it back up. I could have saved myself some work had I done that, though I would not nearly be as thrilled with the result as I am currently. Underneath my ugly fluorescent lights were two standard light fixture boxes. One for each light bank. I could have installed any type of lighting into the lighting box and the popcorn ceiling would have been undisturbed. We did have to move one, but that would have meant a minor repair to the popcorn ceiling, cutting a new hole for a secondary box and pulling some wires. Simple. 


It was out of my fear, that a plot to remove the fluorescent lighting was born. Our kitchen ceiling is not attached to any other part of the house's ceiling. We knew that we could install a "feature" and not have to carry it through the rest of the house. After many discussions, my husband and I decided to put a textured wallpaper onto our ceiling. The texture on the paintable wallpaper that we found, mimicked a tin tile. As you may or may not know, hatching an idea is only the first part of a plan. Actually installing it and deciding upon how to install it is the more difficult aspect of the planning process. 

Our ceiling is sloped, it is almost 12' high on one side of the room and about 8.5 or 9' on the other. That's high, really high! We opted to put drywall directly on top of the popcorn ceiling. I'm 5' tall. This was going to be challenging!

Enter Drywall Lift. Wow! This saved our backs and a lot of time. We rented it for four hours at Home Depot for approximately $40. Best money spent throughout the process of this reno! It was simple to use and saved our old backs! To use the drywall lift, you place your sheet of drywall onto the lift. You then turn a wheel which lifts the sheet of drywall and levels it with the ceiling. Turn the wheel until the sheet perfectly meets up with the ceiling and then screw it into the existing ceiling. So simple. If you've already marked the studs on the ceiling, you line your drywall screws up with your markings. Even more simple. 


In order to save money, we made sure all prep work was completed before picking up our Drywall Lift. 


Ok. That joke never gets old. Stud Finder!!!!  I'm sure my hubby is tired of it! I have always claimed to be a "stud finder," that's how I picked him! Regardless as to where my talents lay, he always insists on using the little yellow thing that beeps and lights up to find studs. He marked them right onto the ceiling with a marker to use as a reference when screwing the new drywall onto the ceiling. He also picked up a nifty little lighting cutter to cut out light fixtures. The lighting cutter looked like a compass and cut perfect holes into the drywall which fit over the lighting boxes. All of this work was complete before the Drywall Lift was picked up. 


I also started priming walls as a new ceiling deserves a new wall colour. Currently, my favourite colour is Vintage White. If that even counts as a colour!  I'm slowly painting the whole house to white and grey. I'll add additional colours with beautiful accents. Like my teal coffee maker, my red Kitchen Aid or funky throw pillows.

Once the drywall boards were installed, we used drywall tape to cover seams, after the tape was dry, we installed the wallpaper. Maybe you know this about me, maybe you don't? Instructions aren't fully my thing. Sometimes there's just a better way. Anytime my husband and I install wallpaper, we use wall adhesive, pictured below, there's no wetting preglued sheets of paper for me!!!!  Way too messy!!! I love this product and use it all of the time, even with preglued paper. You simply paint the surface and the back of the wallpaper and then position accordingly. It dries quickly but you still have some time to push out air bubbles or reposition your paper. Similar to water installation but less drippy, sticky and wet. 


When painting on your glue, you're going to need a long clean space. The hallway was just perfect! We glued our sheets horizontally across the ceiling, right over the lighting boxes. Holes to accommodate lighting were marked and cut, after the fact. 
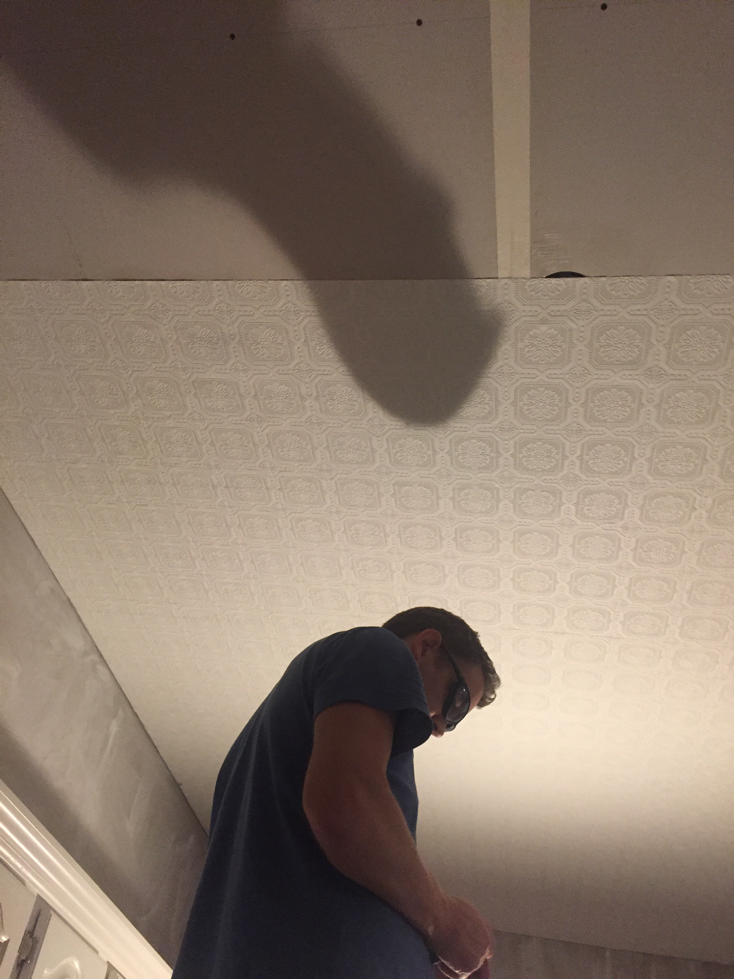


This was certainly tiring work. The long weekend I budgeted to complete the job was nuts. Glue needs time to dry, especially if you're painting your ceiling grey. We had to allow 24 hours for the glue to cure before painting, which gave us time to stop, enjoy our kids and attend a family dinner. A girl's gotta have some fun!


We chose a grey paint for the ceiling. When painting a ceiling, you need a relatively thick paint, otherwise it drips. Also, when you're working with texture, you require a high pile roller. However, even with a high pile roller, it was challenging to achieve full coverage. Get ready for some hard work, many coats of paint and perhaps even stippling with a paint brush while standing on the top rung of the ladder. 


Work hard, be patient (I totally wasn't), enjoy time with someone you love and this job will make you feel accomplished by the time you're done. I'm so happy with my NOLA Kitchen. 


Please feel free to comment below if you have any concerns, questions or you just enjoyed this Big Idea. Thanks for reading!!


Thursday, 15 June 2017

'Tis Taco Tuesday!!!!


'Tis Taco Tuesday!!!  Ok, it's not, but it was!!!  As always, it was a hit in my home!!  My kids LOVE tacos. One problem, I hate premade seasonings. I do not trust large companies to make the right choices for my family. Taco seasoning is intended to sit on the shelf for years. Years!!  In order to do that, companies load their seasonings with preservatives and sodium. Preservatives wreak havoc on the digestive tract and sodium leads to nothing better than heart disease. 

It was under this circumstance that I set out on a journey. A journey to perfect my homemade taco seasoning. I think I've done it!  So do my kids. 


If it was good enough to write in this book and draw a tiny picture of a taco, I think it's worth sharing! 

Mel's Homemade Taco Seasoning

2 tbsp of Chili Powder
1 tsp of Garlic Powder
1 tsp of Onion Powder
1/4 tsp of Crushed Red Pepper or Chili Flakes 
1/2 tsp of Dried Oregano 
1 tbsp of Cumin
1 tsp of Ground Sea Salt
1 tsp of Black Pepper

Mix this list of ingredients together in a resealable container. It makes about 4 heaping tablespoons of seasoning which is plenty for two batches of tacos. One batch today and one for your next Taco Tuesday. 

Instructions:

In a pan, fry your chosen ground meat: beef, chicken, veggie ground, bison, elk, whatever your family prefers. I mix it up and serve different types of tacos every week. Once your meat is browned, add two heaping tablespoons of seasoning and half a cup of water to your pan. Allow ingredients time to marry and  the water to evaporate. Serve with your favourite taco toppings and hard or soft shells. I often choose lettuce as a delicious wrapping option. Pictured below are my chicken tacos with corn tortillas. Mmmmm


When time allows, I love to make my own homemade tortillas. I have placed a link, to my favourite recipe below:


I always make my tortillas with avocado oil. The trick to a really good homemade tortilla is to not over cook them!! You want them soft and rollable! 

My absolute favourite part of Taco Tuesday, other than providing my kids with a healthy meal that they can both gobble up before evening activities, is the Taco Salad I eat for lunch on Wednesday. A Taco Salad, topped with my favourite salad topping...Fritos. Yup. Fritos. 


Thanks for taking the time to read this post. I hope it inspires you to try a new recipe; to take control away from big companies and mix up your own seasonings. Open your spice drawer and think creatively. You won't regret it!  Making your own taco seasoning takes almost the same amount of time to mix up as it does to tear into a premade envelope and it's much healthier for you and your family. 

Feel free to comment below if you have any questions, concerns or you just liked this Big Idea!

Thursday, 25 May 2017

Calendar Making Woes and Joys


I have a "Love / Hate" relationship with my calendars. I have been making them since my daughter turned 1. She's 12 now. That's a lot of calendars and a ton of scrapbooking!  The first year I made them, I decided the month before Christmas that I was going to make 5 handmade calendars for the grandparents, great grandparents and one for myself. I had no idea of the time and stress this gift might cause. Even those simple calendars required me working day and night. My husband became an over night scrapbooking sensation, popping eyelets through pages and stamping the month names onto the calendars...even SPETEMBER (his mom got that calendar). My initial intention with calendars was to make one, a highlight of MacLean's first year. They were so well received that I keep making new ones...every year. 


These calendars highlight special moments that occurred in the previous year, during that month. We had a fantastic 2016! A new puppy, growing children, my nephews starting preschool and kindergarten. I was so excited about how the calendars turned out this year! Each layout, more special than the last. This year's calendars were equally as pressed for time as the first simple one I sat down to do in 2005, the technique, however, has improved. 


I use many different scrapbooking techniques in my calendars. Each page begins with a photo, from there, I draw out colours, find coordinating papers and look for inspiration. I often find inspiration at a local scrapbooking store, The Scrapyard, its a vortex of creativity. They offer many classes and have the most wonderful scrapbookers on site. There is always someone around, willing to offer you some helpful advice or to teach you the latest technique. 


When I make calendar layouts, I always leave the brand strip on the bottom of the page. I bind the calendars myself and find that this extra bit of paper helps with reinforcing your coil. I later choose a coordinating paper that I can fold over the front and back of the layout to ensure a strong reinforcement. This is challenging. Not reinforcing. Mixing your patterns. The blank calendar page gets glued onto the back of your layout. Its not always easy to match the black and orange layout to whatever colour scheme you chose for your November layout. Neutral patterns come in handy for that!


As you can see from this photo. I opted for a black and white wood grain print, which works well with my November layout and even better with the October prints!

This year, I used so many new photo editing apps. These added even more detail and interest to my layouts. I've always loved the instagram filters but there are so many other special apps out there. A few of my favourites are "A Beautiful Mess," which is an amazing collage app and "Waterlogue," with this app you have the ability to change your photos into watercolour "paintings." A Beautiful Mess allows you to put photos into collage frames, add filters, wording, images and borders. Waterlogue, has so many different styles of watercolour that you can create photos that look like historic artworks or even comic book frames. When these two apps are used in conjunction with each other, you can create interesting pieces like this...


When you're rushing to create a Halloween page, having the ability to print a photo layout like this one, on an 8.5 X 11 photo page, makes it very quick to create a 12 X 12 scrapbooking layout. As you can imagine, most of the layout is covered, you only have a few details to add to your hybrid digital / handmade scrapbooking piece. 

Typically, the last layout in my calendar is a family photo in front of our tree. I was renovating for guests prior to Christmas and designing a calendar. Decorating my tree would have to come after I mailed the calendars out to two sets of grandparents. I found inspiration for my December layout in an old photo of my brother and I at Christmas and an old Christmas book, T'was the Night Before Christmas. This copy of the classic Christmas story belonged to my children's great grandmother. I couldn't help but photocopy the image of Santa in the chimney onto cardstock and fussy cut it, to add as an important vintage element on my holiday layout. I just love the way it turned out. 


These gifts are so personal, my mother in law's calendar features very different photos than the one for my mom. My mother's calendar is drenched with photos of her grandchildren (my neice and nephews that live so close to me). My own often features family photos of my little family unit of four. All of the layouts, however, are made from the same papers and elements and come together quickly. The first one taking 2-3 hours to create and the final one, 15 to 20 minutes to recreate. 


I hope after reading this article, you find some inspiration to sit down with your photos and make something beautiful for someone you love. This project always causes stress because I never start it early enough. I'll never stop making them though, I enjoy them way too much. 

Thanks for reading!!  Feel free to comment below with any questions or concerns, or if you just liked this Big Idea. 

Wednesday, 24 May 2017

Quick and Healthy Eats. A Local Treat. Soffritto Bison Lasagna


I realize I often write about convenience food.  Its because quick meals are a reality for many families. These modern times have different rules and expectations than many other generations. In so many homes, both parents work, children are busy with extracurricular activities; we're hyper focused on nutrition and require a healthy meal to be laid out on the table before rushing off to evening activities. There are ample reasons for busyness. The reality of the situation is that we fill our time, regardless of what it is filled with, it is filled. 

Lately my time has been filled with renovations. Painting, gluing, wallpapering and all in my kitchen. A fridge in my dining room; a week end without a stove; the perfect recipe for lots of eating out.  Or preparing quick meals like this...


Romantic pic hey? Even a filter cannot make this turkey wrap look appealing. We were installing a new ceiling, we needed some quick energy. The Laughing Cow Cheese was a supremely good alternative to Mayo, my kids loved it. Unfortunately, I had limited space to cook and eat and lots to do. Going out for a burger was exactly what we needed to do! 

We opted for a local restaurant, Boardwalk Burgers. We had a coupon, their new location was close to our house and we had never tried it before. Why not try something new? The burgers were pretty good, I've had better but they were decent, the fries were yummy and the malts looked good...though I didn't try them. Seemed like a few too many calories for one meal. Our coupon was for a free burger. We ordered two large fries, two regular drinks, and four burgers. The total was around $40, with a free burger. The large fries were obscene, one would have been sufficient for the whole family. Regardless, the kids liked it, but I had to listen while they whined about no malts. I left, frustrated with my kids, ready to get back to work in the kitchen and with a stomach ache. That kind of food doesn't sit well. Its not great fuel and though the thought of a diner style restaurant is fun, it is never what your body needs. 

This evening I was looking for some actual food. I'm still working hard with the reno...ceiling paint is on the list for things to do tonight. I didn't want to spend a ton of time on food prep or messing up my kitchen but I wanted real food. I stopped by one of my favourite local stores...Soffritto. I checked in with Gord, the owner, to see what he would recommend. Lasagna was his suggestion. Bison Lasanga. I decided to spend the same amount on dinner as our burger excursion on the week end. $40. That bought me two lasagnas. I had a Caesar Salad Kit in the fridge, on which I had spent a whopping $3.99; so this meal was essentially the same cost. Not the same nutrients. 


Soffritto boasts that their meals are made from high quality and local ingredients. They have every right to boast. Farmers Market bison, locally sourced tomatoes, fresh chewy and stringy cheese, homemade noodles and a housemade, herbaceous, rich sauce that features one of my favourite flavours...red wine. 

It cooked up easily and quickly and according to the package instructions. I preheated the oven to 375 F; I opted to cover loosely with tinfoil at 30 minutes and baked for a total of 50 minutes. 


They baked up beautifully. Smelled divine and tasted delicious! Real food. No kitchen mess. What a delightful and quick meal. I served lasagna with my favourite side salad, Caesar with some chopped kale, for added goodness. The kids were thrilled with dinner and so was I. After a week of garbage eating, I was happy to present a home cooked meal that didn't leave me feeling exhausted, in a messy kitchen. The ceiling wasn't going to wait. 


Best part of this experiment...it came in waaaay under budget...


It was so filling, we only ate one. $20 to feed my whole family? That's great value!  Cheaper than take out. Luckily the lasagnas come in these nifty containers, we packaged up the second one to be consumed for lunches or another meal later this week. Tonight, to celebrate our delicious, under budget meal, we opened a lovely Tempranillo. It perfectly complimented dinner and to motivated this girl to get some construction done! 


I understand that we don't all have a Soffritto around the corner, but look around, you might be surprised by what you find at your local Farmers Markets, Grocery Stores and Restaurants. It's ok to demand more from the food you're eating. Your body needs fuel. Delicious fuel. Thanks for reading!!!  If you have any questions or concerns or you just liked this Big Idea, please feel free to comment below!


Thursday, 18 May 2017

Pizza, garlic fingers and salad


All good pizzas start with a good crust. A foundation, a  bit of chewy, bready goodness. The same rule applies with garlic fingers. I grew up on the east coast of Canada where garlic fingers are staple.  Many, many nights of drunken debauchery ended with the consumption of a large garlic fingers. Some might even consider said consumption a preventive measure to avoid an inevitable hang over. After university, I moved to western Canada. A place where garlic fingers did not exist.  Seems like reason enough to pack up and move back home! Or learn how to make them really well. Get all of your westerner friends hooked on them. Teach them about the life force that exists in a pan of garlic fingers. This girl was up for the challenge! 

The link below is my current favourite pizza crust. It is an amazing, no fail crust that comes together very quickly; within 2 hours.  


If you're making pizza and garlic fingers, the above link is a good place to start. The recipe makes two really good sized crusts. 

Once your dough has risen, roll it out. Sprinkle your pizza stones with cornmeal and preheat your oven to 450 F. 

The other secret to a really good garlic fingers, is a delicious garlic butter, you can buy a store bought butter or whip one up on your own, this one is my go to!!  Swiss Butter House Ltd Garlic Lover's garlic butter is fantastically delicious!!  


My next tip for pizza and garlic fingers is to always mix your cheeses! My personal fave is mozzarella and parmesan. I always add half parm and half mozza for my garlic fingers. My pizza ratio is 3/4 mozza to 1/4 parmesan. Parmesan is so special on a pizza, it adds a big bold Italian flavour to your pizza, plus it helps with the browning of your cheese. 


When I make a pizza, there is only one true set of toppings for me. As I have already mentioned, I grew up on the east coast of Canada. In my home town when I order a pizza, I order a "Combination Pizza." The perfect combination. Pepperoni, mushrooms and green pepper. These flavours are so perfectly married that that East Coasters have aptly named this pizza Combination. Are there any other combinations? Sure, but not for this girl!

Once your toppings are prepped and your dough has been stretched and rolled out, place it on your pizza stone, which has been dusted with cornmeal. Add your favourite sauce (left over bolognese makes an extra special base sauce), your favourite toppings; feel free to venture away from "Combination," though I wouldn't recommend it, and bake for 18-20 minutes in your very hot oven! Make sure you cool your pizza and garlic fingers for a few moments before you cut. Otherwise your toppings slip around, although you may enjoy eating the cheese off of the closest slice, that slice becomes far less appealing to your friends and family without its toppings!!  I always serve my garlic fingers with either pizza sauce or donair sauce. The recipe below comes together quickly and easily. 


As always, serve with a salad. Half your plate people!!!  Veggies couldn't be more important!  Your body needs fibre. I quickly beefed up this Caesar Salad Kit with some chopped kale. Super delicious and nutritious!!  

This whole meal came together in two hours, before my kid's evening activities!  The reviews were fantastic! 

Thanks for reading! Few free to comment below with any questions, concerns or if you just liked this Big Idea!!

Wednesday, 17 May 2017

Sometimes Soccer Gets Cancelled: Perfect Potato Side Dish


Every once and a while you get a quick break. An unexpected break.  I got one tonight! My daughter has been playing soccer 5 times per week. It is fantastic for her health and we love to watch her practice and play, but on a cold and rainy day a cancelled practice is a treat! A treat for mom and dad with wine!!


My hubby and I have been exploring the Bordeaux region as of late, so we cracked this one and I cooked a roasted chicken, made up some gravy, baked some zucchini, tossed together a Greek Salad and served them with these fantastic potatoes!!


These potatoes are delicious, rustic and simple. Before you begin prepping, preheat your oven to 425F. 

Prepping these potatoes over the years, I have experienced a challenging moment or two. I absolutely hate when I cut straight through them. It totally ruins the presentation and is easier to do than you would expect! I have a trick!!! Much internet research has led me to this incredibly brilliant innovation. I cannot take the credit, nor can I remember where I picked up this handy trick but....


That's it! Chopsticks! They act as the perfect guide to assist in keeping your potatoes in tact! 


After your potatoes are sliced, add a healthy serving of butter to each potato, along with some salt and pepper. 


Bake for 20 minutes. Add more butter and some salt and pepper and cook for an additional 15-20 minutes. 


When the potatoes come out of the oven, feel free to sprinkle them with Parmesan Cheese and fresh herbs.  Tonight, I opted to keep them simple, as I was serving with a creole spiced chicken, garlic roasted zucchini and a Greek Salad. Seemed like I had enough going on!


There you go guys! I always say I'm a hyper hypo! Once again, I have provided proof.  As the oven was already on, I tossed some barbeque chicken legs in for the kids lunches.  Its like I love doing dishes or something...I do not. 

Thanks for reading!! If you have any questions, comments, or you just liked this Big Idea, feel free to post below! 

Sunday, 14 May 2017

Where Problems Become Details, My Own Creative Space


My husband and I are always tearing something apart in our house and as I prepare to take on a ceiling and lighting job in our kitchen, next week, I'm reflecting on our last renovation. You may or may not know this about me; I'm a creative mess. I love to make things. All things. Anything! 


See!?! Total Creative Mess!!   I've been scrapbooking for years. I'm always working on one project or another and until recently, I was working in a pretty uninspiring space. A space that had almost no storage and a giant bed in the middle of it. A bed I covered with layouts, ribbons, glue, scissors. Heaven forbid I'd have a guest. I'd have to hide everything away! Lose momentum on projects, or lose the projects all together! It came from this frustration that my husband and I decided to upgrade my creative space. 


The basement bedroom has a tiny window. An itty bitty window that allows minimal light into a rather large basement room. There was a huge, oversized closet in the room that inefficiently housed most of my supplies. It jutted out from the wall and covered half of the window. As enlarging the window was not an option at this point, my husband decided our best approach was to remove the closet. Which might seem nuts but it actually worked out quite well once we dealt with headaches related to the design of the space. The closet was placed where it was, as it hid the duct work and air vents that ran from one end of house to the other. We opted to box the duct work in and wall paper the wall as a feature to house my desk and the IKEA storage unit we purchased for my supplies. 


There was a support post built into one of the closet walls. We structurally needed to leave that where it was and opted to distress pallet boards to build it in. It became a feature as well. A problem became a detail. 


These details or problems add character to a space and working in an older home, you find problems around every corner!


My Scrapbooking Room still needed to be a functional guest room, so we added a beautiful Murphy Bed, from Costco's Bestar Line. Alongside the bed we ordered and installed storage units, from the same line.  This was truly the best solution. I now have the entire floor space for large projects (like my current one...painting and distressing a dining table and chairs). 


This project worked out very well. I now have an inspiring space with plenty of room to move around! A place to sleep and some extra storage for my guests. Just what I needed!!!

I'll keep you all posted with future adventures in my old house...full of problems...oops! I mean details! 

Thanks for reading!!! Please feel free to comment below with any questions, concerns, or if you just liked this Big Idea!!!

Thursday, 11 May 2017

Oh! For Convenience Sake!!


It is day four of driving kids to activities, cleaning the house, dropping kids at school. I'm heading into day three of volunteering this week and I'm getting ready to host two play dates tomorrow afternoon at an indoor playground, where I too will need to run, jump and climb like a ninja. I'm tapped out My Friends! This mama needs an easy dinner! 

Buying convenience food is a necessity. Everyone needs a break from time to time. Convenience foods, however, are not all created equal. I have a few tips and tricks up my sleeve that will help you find healthier options for you family. 

My first recommendation is find a grocery store that makes food on site, from healthy and wholesome ingredients. Living in a city, I'm very fortunate. Some of my favourite stops for healthy and convenient food are places like Soffrito's, a local oil distributor that sells fantastic homemade pizzas, pastas, casseroles and salads. It'll cost you more than a trip to McDonald's, but your kids need fuel to get through their evening activities after a full day at school. These "homecooked meals" are no different than something you would prepare in your own kitchen, full of fibre, nutrients, proteins and healthy fats. The mess, however, is in someone else's kitchen.  You get all of the glory and the credit for something that someone else prepared! 


Another favourite stop is my local Italian Market. Spinelli Italian Centre is a grocery store, a bakery, a deli and a Cafe. Which means I can fuel my body on the best and most affordable cappuccino in town, while picking up healthy ingredients and meals for my family. Better yet, I can book a coffee date with a friend and then bumble through the store. 

I grabbed so many awesome and convenient foods at the market today. When I'm shopping for convenience, I'm looking for minimal ingredients. A short list. Ingredients I know by name. 


I picked up these potatoes on a recommendation from my Bestie. She's says they're super delicious, can't wait to munch on my potatoes cooked in duck fat, which by the way crisps up a potato like no other potato.  They'll be lovely alongside some chicken, served with broccoli or a bagged salad. 


This sweet kale salad is so good I forgot to photograph the bag. All I'm saying is convenient doesn't need to be unhealthy, it just needs to be quick!

I keep Coco Brooks frozen pizzas in my freezer. I love to pick up the kid's cheese flavoured one. This is a locally made pizza, from a company that offers tons of fundraising opportunities for charities, schools and organized sports. 


A cheese pizza is a perfect jumping off point for kids. A great lesson in simple cooking. Sure you could have it plain or you could add your favourite toppings before you cook it up. Your favourite pepperoni, salami or even mushrooms. 

Today we're having Meatball Subs, garlic buttered with marinara sauce, spinach, a sprinkle of parsley and Parmesan Cheese. This recipe is simple especially when you don't need to prep the meatballs!  I purchased these meatballs at the Italian Market, they cost me about $13.00 and they're fantastic. 


How about if you don't even need to cook your marinara sauce? Even more simple, right? As you can see the sauce was $6.25, I only needed half of it, I'll freeze the rest for a later date!! I'll use it on a pizza, as a pretzel dip or over pasta. 


I picked up torpedo buns for our sandwiches. Mmmm. They were made in the bakery at the market. I buttered the buns with my favourite garlic butter, which I always keep on hand. 


I had a few extra minutes, as you can see in this pic, its only 5:09. My first sport drop off was at 6pm. Lots of time! I sautéed some zucchini in my favourite olive oil...Soffritto's Garlic Infused Olive Oil. I buy as much of it as I can, as often as I can! I also added some sea salt, some pepper and some oregano. 


These zucchini rounds were a nice touch! I served my kids meatball sandwiches on toasted torpedo buns, with sautéed zucchini, spinach and fresh parsley. They may or may not have removed the zucchini...but I definitely enjoyed it! They did partake in the side Caesar Salad and the heirloom carrots. They even left their spinach on their subs. 


There you have it!! Quick, convenient and relatively low cost. I'm calling this one...#winning. 

If you have any questions, comments or you just liked this Big Idea, feel free to comment below! Thanks for reading!!